1. 출처 : http://www.joinc.co.kr/modules/moniwiki/wiki.php/Site/System_management/ZFS
-------------------------------------------------------
1 ZFS
유닉스의 파일 시스템을 대체하기 위해서 SUN에서 개발한 파일 시스템으로 Solaris 10에 소개된다. 기능을 보면 알겠지만 단순한 파일 시스템으로 보기는 힘들다. 모든 잡다한 관리기능까지를 포함한 볼륨메니저로 봐야 한다. 예컨데 파일 시스템과
Logical Volume manager, snapshots, copy-on-write clones, continuous integrity checking, automatic repaire, 등 무슨 기능일지도 모를 것 같은 다양한 기능들을 가지고 있는 확장된 파일 시스템이다. ZFS를 써본 사람들은 지상 최대의 파일 시스템이라는 찬사를 보낸다.
정말 그러하다. 나는 Cloud 환경에서 신뢰성과 확장성, 성능과 관리성까지 두루 갖춘 만능 File System을 찾아보자라는 목적으로 살펴보게 됐다.
ZFS의 기능을 정리했다.
- Data Integrigy 다른 파일 시스템과 구분되는 가장 큰 특징이다. 디스크 상의 유저 데이터를 보호준다. bit rot, cosmic radiation, current spikes, bugs in disk firmware, ghost writes 등으로 부터 데이터를 보호해 준다. 물론 Ext, XFS, JFS, ReiserFS, NTFS 등도 유저 데이터를 보호하기 위한 기능을 가지고 있기는 하지만, ZFS는 이들 보다 탁월한 성능을 보여준다.
- Storage Pool LVM과 마찬가지로 하나 이상의 장치를 통합해서 관리할 수 있다. 이 논리적인 Storage Pool을 zpools라고 하며, block device 처럼 작동한다. 블럭 장치들은 다양한 레벨로 조합할 수 있습니다. non-redundantly (RAID 0과 비슷), mirror ( RAID 1과 비슷 ), RAID-Z (RAID-5와 비슷), RAID-Z2 (RAID-6와 비슷) 등등이다.
- Capacity : ZFS는 128-bit 파일 시스템으로 용량에는 제약기 없다고 보면 되겠다. 페타바이트급 파일시스템이라고 하는 이유가 있다.
- 2^48 개의 독립된 디렉토리를 다룰 수 있다.
- 파일의 최대크기는 16 exabytes ( 16 X 10^18)
- zpool의 최대 크기는 256 zettabytes (2^78)
- 시스템에서 zpools의 갯수는 2^64
- zpools에서 파일 시스템의 갯수 2^64
2 Linux와 ZFS
Linux에 ZFS를 이식하기 위한 노력이 진행 중이다. 이식은 두 가지 방향으로 이루어지고 있다.
- native ZFS
리눅스 커널이 ZFS를 지원하도록 하는 프로젝트
- zfs-fuse
fuse를 이용해서 ZFS를 지원하도록 하는 프로젝트
아직까지는 Linux에서 마음놓고 사용할 만한 수준이 아닌 것 간다. zfs-fuse 같은 경우에는 성능에 문제가 상당히 있어서
zfs란 이런 거구나를 체험하기 위한 수준 정도에서나 사용할 수 있을 것 같다. . Native ZFS는 눈여겨 볼만하다. 꾸준히 개발하고 있는 것 같기는 한데, 언제쯤 1.0이 되서 믿고 쓸만한 날이 올지 모르겠다. 1년전에 0.6.x 버전이었는데, 지금(2013년 9월)도 0.6.x 버전이다.
2.1 zfs-fuse
- apt-get install zfs-fuse
- zpoll create mypool /dev/sdb /dev/sdc /dev/sdd /dev/sde
- zpool status mypool
- zfs create mypool/testzfs
- FS 성능 측정 : Bonnie++
3.1 opensolaris 설치
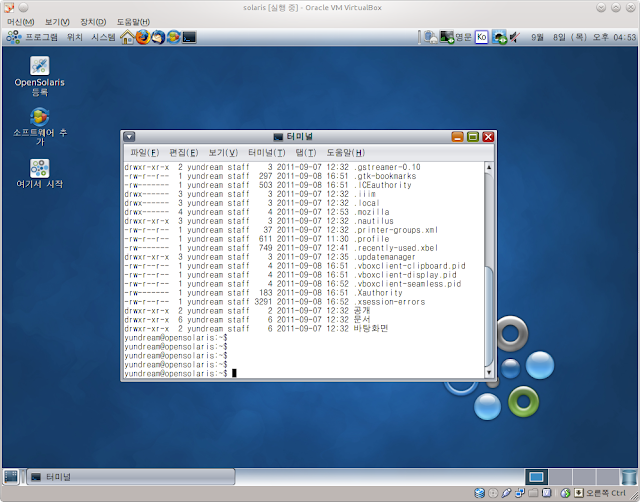
솔라리스는 ZFS를 기본 파일 시스템으로 하고 있다. 이렇게 된거 x86기반의 opensolaris를 설치해서 ZFS를 경험해 보기로 했다. VirtualBox를 이용 해서 가상으로 올렸다.
- hypervisor : VirtualBox VirtualBox 와 opensolaris 모두 Oracle에서 개발하고 있으니, 궁합이 잘 맞을 거란 생각이 든다.
- OpenSolaris
설치는 윈도우보다 간단하다. 설치 과정은 생략.
솔라리스를 마지막으로 써본게 아마 9년전 쯤인것 같다. 2002년이던가 ? 당시만 해도 상당히 투박한(하지만 왠지 멋져 보이긴 했음) CDE 화면이었는데, 지금은 gnome이 뜬다. 예쁘다.
논리적 볼륨 관리자의 핵심은 장치를 아우르는 하나의 pool을 만드는 거다. 이 pool을 zpool이라고 부른다.
테스트를 위해서 SATA 2G x 2 장치를 준비했다. 리눅스에서 하던 것처럼 fdisk -l로 장치를 확인하려고 했더니, 내가 원하는 그 fdisk가 아니다. format으로 장치를 확인할 수 있다.
# format
AVAILABLE DISK SELECTIONS:
       0. c7d0 <DEFAULT cyl 2085 alt 2 hd 255 sec 63>
          /pci@0,0/pci-ide@1,1/ide@0/cmdk@0,0
       1. c9t0d0 <ATA-VBOX HARDDISK-1.0-2.00GB>
          /pci@0,0/pci8086,2829@d/disk@0,0
       2. c9t1d0 <ATA-VBOX HARDDISK-1.0-2.00GB>
          /pci@0,0/pci8086,2829@d/disk@1,0
c9t0d0, c9t1d0을
tank라는 이름의 zpool로 묶기로 했다.
# zpool create tank c9t0d0 c9t1d0
제대로 만들어 졌는지 확인.
# zpool list
NAME    SIZE   USED  AVAIL    CAP  HEALTH  ALTROOT
rpool  15.9G  3.80G  12.1G    23%  ONLINE  -
tank   3.97G   232K  3.97G     0%  ONLINE  -
zfs로 파일 시스템에 대한 상세 정보를 확인.
# zfs list
NAME                         USED  AVAIL  REFER  MOUNTPOINT
rpool                       4.16G  11.5G  77.5K  /rpool
rpool/ROOT                  3.16G  11.5G    19K  legacy
rpool/ROOT/opensolaris      3.16G  11.5G  3.02G  /
rpool/dump                   511M  11.5G   511M  -
rpool/export                5.04M  11.5G    21K  /export
rpool/export/home           5.02M  11.5G    21K  /export/home
rpool/export/home/yundream     5M  11.5G     5M  /export/home/yundream
rpool/swap                   512M  11.8G   137M  -
tank                        74.5K  3.91G    19K  /tank
zfs는 디렉토리 형태로 pool을 관리할 수 있다. tank 밑에 music, movie, source 3개의 파일 시스템을 만들어 봤다.
# zfs create tank/music
# zfs create tank/movie
# zfs create tank/source
# zfs list
NAME                         USED  AVAIL  REFER  MOUNTPOINT
...
tank                         154K  3.91G    23K  /tank
tank/movie                    19K  3.91G    19K  /tank/movie
tank/music                    19K  3.91G    19K  /tank/music
tank/source                   19K  3.91G    19K  /tank/source
3개의 파일 시스템이 추가로 만들어지긴 했지만 volume을 모두 공유해서 사용하고 있다. 내 목적은 각 파일 시스템 별로 쿼터를 정하는 거다. /tank/movie를 1G를 사용하도록 쿼터를 할당했다.
# zfs set quota=1g tank/movie
# zfs list | grep tank
tank                         154K  3.91G    23K  /tank
tank/movie                    19K  1024M    19K  /tank/movie
tank/music                    19K  3.91G    19K  /tank/music
tank/source                   19K  3.91G    19K  /tank/source

# df -h /tank/movie
Filesystem            Size  Used Avail Use% Mounted on
tank/movie            1.0G   19K  1.0G   1% /tank/movie
3.3 mirror, RAIDZ, RAIDZ2
ZFS는 mirror와 RAIDZ, RAIDZ2 3가지 RAID 레벨을 지원한다. 10G SATA Disk 6개를 추가해서 각 모드별로 테스트를 진행했다.
RAIDZ와 RAIDZ2는 각각 RAID 5와 RAID 6와 매우 유사하다. 즉
- RAIDZ : RAID 5 처럼 블럭 기반 striped 와 하나의 분산 parity 블럭을 가진다.
- RAIDZ2 : RAID 6 처럼 블럭 기반 striped 와 두개의 분산 parity 블럭을 가진다.
5 Nexenta
Nexenta는 opensolaris 기반의 NAS/
SAN어플라이언스 제품이다. 기업환경에서 ZFS를 이용해서 안정적으로 스토리지 시스템을 구성할 수 있도록 HA(High Availability cluster), Namespace Cluster, CLI및 GUI(웹 기반의) 인터페이스를 제공한다.
6 History
- 작성일 : 2011년 9월 6일
- 수정이력
- 작성 : 2011/9/6
- 2013-08-31 : 문장을 다듬었음. 링크 추가
------------------------------------------------------------------------------------------------------------
zfs 파일 시스템의 관련 블로그들의 대부분은
spl-0.6.0-rc6.tar.gz, zfs-0.6.0-rc6.tar.gz를 가이드했지만 내가 이 블로그를 쓰는 시점은 0.6.3을 받았다. 버전별로 리눅스 커널 지원이 다르다.
관련 패키지 정보는 ZFS 관련 공식 사이트인 아래 링크에 들어가서 받도록 하자.
http://zfsonlinux.org/
------------------------------------------------------------------------------------------------------------
2. 출처 : http://blog.lovetonight.net/m/post/164
마성민 | 2013/04/19 11:37 | Linux 앱으로 보기 약 30TB 정도의 데이터 백업을 위해 백업 서버를 한대 구성하고 XFS로 포맷하고 데이터를 저장..
파일 개수가 약 1억개 정도 되다보니.. 데이터를 백업 하는 과정에서 계속 XFS 파티션이 깨지는 현상이 발생..
거기다 설상가상으로 서버이전이다 뭐다 해서 용량이 갑자기 10TB가 추가되어버린..
ㅠ_ㅠ 아.. 서버 재구성해야 하나.. 했는데..
이번기회에 ZFS로 가보자 하고 결정..
아래 내용은 Onenote에 정리해둔 내용을 옮겨적음..
[기본환경]
- OS : CentOS release 6.3 (Final) 64Bit
- Kernel : 2.6.32-279.19.1.el6.x86_64
[설치]
- Linux 시스템에서 ZFS를 사용하기 위해서는 Native ZFS를 이용하는 방법과 ZFS-FUSE를 이용하는 방법이 있으며, 각각의 방법에 따라 ZFS 버전이 달라질 수 있습니다.
- 먼저 ZFS 구성을 위해 기본적으로 필요한 항목들을 설치 합니다.
Shell > yum install kernel-devel zlib-devel libuuid-devel libblkid-devel libselinux-devel parted lsscsi |
Native ZFS는 Kernel 모듈 방식으로 동작 하기 때문에 위와 같이 kernel-devel을 반드시 설치해 주어야 합니다.
- ZFS패키지인 SPL과 ZFS 패키지를 다운로드 합니다.
다운로드는 http://www.zfsonlinux.org 에서 받을 수 있습니다.
- 다운로드한 각 패키지의 압축을 해제 한 후 설치를 진행 합니다.
# spl install Shell > tar xvfz spl-0.6.0-rc13.tar.gz Shell > cd spl-0.6.0-rc13 Shell > ./configure && make rpm Shell > rpm -Uvh *.x86_64.rpm Shell > cd .. # zfs install Shell > tar xvfz zfs-0.6.0-rc13.tar.gz Shell > cd zfs-0.6.0-rc13 Shell > ./configure && make rpm Shell> rpm -Uvh *.x86_64.rpm Shell > cd .. |
- 설치된 zfs 커널 모듈을 인식시켜 줍니다.
Shell > modprobe zfs Shell > lsmod | grep -i zfs |
- ZFS Spool을 생성 합니다.
여기서 ZFS Spool을 만들때 단일 디스크를 사용할 것인지 아니면 여러 개의 단일 디스크를 소프트웨어 레이드 방식으로 구성 할 것인지를 결정 할 수 있습니다. ZFS Spool을 생성할 때에는 zpool 명령어를 사용하며, 해당 명령어에는 다양한 기능들이 포함되어 있으므로 자세한 내용은 공식 Document를 참조하시기 바랍니다.
아래에서는 단일 디스크와 2개 디스크를 미러링 하는 방법, 그리고 4개 이상의 디스크를 Raid5로 구성하는 방법을 설명 하겠습니다.
# EX : zpool [명령어] [옵션] spool # CREATE EX : zpool create [-f|-n] [-o property=value] [-m mountpoint] pool vdev # /dev/sdb 디스크를 backup 스풀로 생성하며, compress option을 기본설정 하도록 한다. Shell > zpool create -o compress=on backup disk /dev/sdb # /dev/sdb 디스크와 /dev/sdc 디스크를 Backup 스풀로 생성하며, Raid1 구성 및 Compress option을 설정 하도록 한다. Shell > zpool create -o compress=on backup mirror /dev/sdb /dev/sdc # /dev/sd[b-f] 디스크(총 5개)중 4개를 Raid5 (Parity Disk 1)구성하고 나머지 1개의 디스크는 Hot Spare 구성을 한 Backup 스풀을 구성하고 /backup_spool 이라는 디렉토리에 마운트 되도록 한다. Shell > zpool create -m /backup_spool backup raidz1 /dev/sdb /dev/sdc /dev/sdd /dev/sde spare /dev/sdf |
- ZFS Spool에 ZFS 파일 시스템을 생성 합니다.
ZFS는 Spool의 공간을 이용하여 파일시스템을 생성할 수 있으며, 각각의 파일시스템은 Spool에 적용된 property Option을 상속하게 됩니다.
# EX : zfs [명령어] [옵션] # CREATE EX : zfs create [-p] [-o] filesystem # backup 스풀의 공간을 이용하여 maildata 라는 파일시스템을 생성하고 자동 압축되지 않도록 구성 한다. Shell > zfs create -o compress=off backup/maildata # Backup 스풀의 공간을 이용하여 mysql 라는 파일시스템을 생성하고 자동압축되지 않으며, /data/mysql로 마운트 되도록 한다. Shell > zfs create -o compress=off -o mountpoint=/data/mysql backup/mysql # Backup 스풀의 공간을 이용하여 user 라는 파일시스템을 생성하고 자동압축되며, 500GB의 쿼터를 설정하고 /home/user 디렉토리에 마운트 되도록 한다. Shell > zfs create -o compress=on -o mountpoint=/home/user -o quota=500GB backup/user |
ZFS로 구성한 후 Compression 옵션 덕분에 실제 8TB 정도 되는 데이터는 5.6TB 정도로 압축되어 저장되었다는 후문이...
ZFS 사랑해요~!
------------------------------------------------------------------------------------------------------------
------------------------------------------------------------------------------------------------------------
출처 : https://github.com/zfsonlinux/pkg-zfs/wiki/HOWTO-install-Ubuntu-to-a-Native-ZFS-Root-Filesystem
Note: These instructions were originally created for older version of Ubuntu (12.04). Some required resource (e.g. grub ppa) is not available on newer versions, thus can lead to errors. If you use Ubuntu 14.04 or newer, see this page instead, which also allows things like raidz root, boot from snapshot, zfs-only setup (no need for separate /boot/grub), and lz4 compression.
These instructions are for Ubuntu. The procedure for Debian, Mint, or other distributions in the DEB family is similar but not identical.
System Requirements
- 64-bit Ubuntu Live CD. (Not the alternate installer, and not the 32-bit installer!)
- AMD64 or EM64T compatible computer. (ie: x86-64)
- 8GB disk storage available.
- 2GB memory minimum.
Computers that have less than 2GB of memory run ZFS slowly. 4GB of memory is recommended for normal performance in basic workloads. 16GB of memory is the recommended minimum for deduplication. Enabling deduplication is a permanent change that cannot be easily reverted.
Recommended Version
- Ubuntu 12.04 Precise Pangolin
- spl-0.6.3
- zfs-0.6.3
Step 1: Prepare The Install Environment
1.1 Start the Ubuntu LiveCD and open a terminal at the desktop.
1.2 Input these commands at the terminal prompt:
$ sudo -i
# apt-add-repository --yes ppa:zfs-native/stable
# apt-get update
# apt-get install debootstrap spl-dkms zfs-dkms ubuntu-zfs
1.3 Check that the ZFS filesystem is installed and available:
# modprobe zfs
# dmesg | grep ZFS:
ZFS: Loaded module v0.6.3-2~trusty, ZFS pool version 5000, ZFS filesystem version 5
Step 2: Disk Partitioning
This tutorial intentionally recommends MBR partitioning. GPT can be used instead, but beware of UEFI firmware bugs.
2.1 Run your favorite disk partitioner, like parted or cfdisk, on the primary storage device. /dev/disk/by-id/scsi-SATA_disk1 is the example device used in this document.
2.2 Create a small MBR primary partition of at least 8 megabytes. 256mb may be more realistic, unless space is tight. /dev/disk/by-id/scsi-SATA_disk1-part1 is the example boot partition used in this document.
2.3 On this first small partition, set type=BE and enable the bootable flag.
2.4 Create a large partition of at least 4 gigabytes. /dev/disk/by-id/scsi-SATA_disk1-part2 is the example system partition used in this document.
2.5 On this second large partition, set type=BF and disable the bootable flag.
The partition table should look like this:
# fdisk -l /dev/disk/by-id/scsi-SATA_disk1

Disk /dev/sda: 10.7 GB, 10737418240 bytes
255 heads, 63 sectors/track, 1305 cylinders
Units = cylinders of 16065 * 512 = 8225280 bytes
Sector size (logical/physical): 512 bytes / 512 bytes
I/O size (minimum/optimal): 512 bytes / 512 bytes
Disk identifier: 0x00000000

Device    Boot      Start         End      Blocks   Id  System
/dev/sda1    *          1           1        8001   be  Solaris boot
/dev/sda2               2        1305    10474380   bf  Solaris
Remember: Substitute scsi-SATA_disk1-part1 and scsi-SATA_disk1-part2 appropriately below.
Hints:
- Are you doing this in a virtual machine? Is something in
/dev/disk/by-id missing? Go read the troubleshooting section. - Recent GRUB releases assume that the
/boot/grub/grubenv file is writable by the stage2 module. Until GRUB gets a ZFS write enhancement, the GRUB modules should be installed to a separate filesystem in a separate partition that is grub-writable. - If
/boot/grub is in the ZFS filesystem, then GRUB will fail to boot with this message: error: sparse file not allowed. If you absolutely want only one filesystem, then remove the call to recordfail() in each grub.cfg menu stanza, and edit the /etc/grub.d/10_linux file to make the change permanent. - Alternatively, if
/boot/grub is in the ZFS filesystem you can comment each line with the text save_env in the file /etc/grub.d/00_header and run update-grub.
Step 3: Disk Formatting
3.1 Format the small boot partition created by Step 2.2 as a filesystem that has stage1 GRUB support like this:
# mke2fs -m 0 -L /boot/grub -j /dev/disk/by-id/scsi-SATA_disk1-part1
3.2 Create the root pool on the larger partition:
# zpool create -o ashift=9 rpool /dev/disk/by-id/scsi-SATA_disk1-part2
Always use the long /dev/disk/by-id/* aliases with ZFS. Using the /dev/sd* device nodes directly can cause sporadic import failures, especially on systems that have more than one storage pool.
Warning: The grub2-1.99 package currently published in the PPA for Precise does not reliably handle a 4k block size, which is ashift=12.
Hints:
# ls -la /dev/disk/by-id will list the aliases.- The root pool can be a mirror. For example,
zpool create -o ashift=9 rpool mirror /dev/disk/by-id/scsi-SATA_disk1-part2 /dev/disk/by-id/scsi-SATA_disk2-part2. Remember that the version and ashift matter for any pool that GRUB must read, and that these things are difficult to change after pool creation. - If you are using a mirror with a separate boot partition as described above, don't forget to edit the grub.cfg file on the second HD partition so that the "root=" partition refers to that partition on the second HD also; otherwise, if you lose the first disk, you won't be able to boot from the second because the kernel will keep trying to mount the root partition from the first disk.
- The pool name is arbitrary. On systems that can automatically install to ZFS, the root pool is named "rpool" by default. Note that system recovery is easier if you choose a unique name instead of "rpool". Anything except "rpool" or "tank", like the hostname, would be a good choice.
- If you want to create a mirror but only have one disk available now you can create the mirror using a sparse file as the second member then immediately off-line it so the mirror is in degraded mode. Later you can add another drive to the spool and ZFS will automatically sync them. The sparse file won't take up more than a few KB so it can be bigger than your running system. Just make sure to off-line the sparse file before writing to the pool.
3.2.1 Create a sparse file at least as big as the larger partition on your HDD:
# truncate -s 11g /tmp/sparsefile
3.2.2 Instead of the command in section 3.2 use this to create the mirror:
# zpool create -o ashift=9 rpool mirror /dev/disk/by-id/scsi-SATA_disk1-part2 /tmp/sparsefile
3.2.3 Offline the sparse file. You can delete it after this if you want.
# zpool offline rpool /tmp/sparsefile
3.2.4 Verify that the pool was created and is now degraded.
# zpool list
NAME       SIZE  ALLOC   FREE    CAP  DEDUP  HEALTH  ALTROOT
rpool     10.5G   188K  10.5G     0%  1.00x  DEGRADED  -
3.3 Create a "ROOT" filesystem in the root pool:
# zfs create rpool/ROOT
3.4 Create a descendant filesystem for the Ubuntu system:
# zfs create rpool/ROOT/ubuntu-1
On Solaris systems, the root filesystem is cloned and the suffix is incremented for major system changes through pkg image-update or beadm. Similar functionality for APT is possible but currently unimplemented.
3.5 Dismount all ZFS filesystems.
# zfs umount -a
3.6 Set the mountpoint property on the root filesystem:
# zfs set mountpoint=/ rpool/ROOT/ubuntu-1
3.7 Set the bootfs property on the root pool.
# zpool set bootfs=rpool/ROOT/ubuntu-1 rpool
The boot loader uses these two properties to find and start the operating system. These property names are not arbitrary.
Hint: Putting rpool=MyPool or bootfs=MyPool/ROOT/system-1 on the kernel command line overrides the ZFS properties.
3.9 Export the pool:
# zpool export rpool
Don't skip this step. The system is put into an inconsistent state if this command fails or if you reboot at this point.
Step 4: System Installation
Remember: Substitute "rpool" for the name chosen in Step 3.2.
4.1 Import the pool:
# zpool import -d /dev/disk/by-id -R /mnt rpool
If this fails with "cannot import 'rpool': no such pool available", you can try import the pool without the device name eg:
# zpool import -R /mnt rpool
4.2 Mount the small boot filesystem for GRUB that was created in step 3.1:
# mkdir -p /mnt/boot/grub
# mount /dev/disk/by-id/scsi-SATA_disk1-part1 /mnt/boot/grub
4.4 Install the minimal system:
# debootstrap trusty /mnt
The debootstrap command leaves the new system in an unconfigured state. In Step 5, we will only do the minimum amount of configuration necessary to make the new system runnable.
Step 5: System Configuration
5.1 Copy these files from the LiveCD environment to the new system:
# cp /etc/hostname /mnt/etc/
# cp /etc/hosts /mnt/etc/
5.2 The /mnt/etc/fstab file should be empty except for a comment. Add this line to the /mnt/etc/fstab file:
/dev/disk/by-id/scsi-SATA_disk1-part1 /boot/grub auto defaults 0 1
The regular Ubuntu desktop installer may add dev, proc, sys, or tmp lines to the /etc/fstab file, but such entries are redundant on a system that has a /lib/init/fstab file. Add them now if you want them.
5.3 Edit the /mnt/etc/network/interfaces file so that it contains something like this:
# interfaces(5) file used by ifup(8) and ifdown(8)
auto lo
iface lo inet loopback

auto eth0
iface eth0 inet dhcp
Customize this file if the new system is not a DHCP client on the LAN.
5.4 Make virtual filesystems in the LiveCD environment visible to the new system and chroot into it:
# mount --bind /dev  /mnt/dev
# mount --bind /proc /mnt/proc
# mount --bind /sys  /mnt/sys
# chroot /mnt /bin/bash --login
5.5 Install PPA support in the chroot environment like this:
# locale-gen en_US.UTF-8
# apt-get update
# apt-get install ubuntu-minimal software-properties-common
Even if you prefer a non-English system language, always ensure that en_US.UTF-8 is available. The ubuntu-minimal package is required to use ZoL as packaged in the PPA.
5.6 Install ZFS in the chroot environment for the new system:
# apt-add-repository --yes ppa:zfs-native/stable
# apt-add-repository --yes ppa:zfs-native/grub
# apt-get update
# apt-get install --no-install-recommends linux-image-generic linux-headers-generic
# apt-get install ubuntu-zfs
# apt-get install grub2-common grub-pc
# apt-get install zfs-initramfs
# apt-get dist-upgrade
Warning: This is the second time that you must wait for the SPL and ZFS modules to compile. Do not try to skip this step by copying anything from the host environment into the chroot environment.
Note: This should install a kernel package and its headers, a patched mountall and dkms packages. Double-check that you are getting these packages from the PPA if you are deviating from these instructions in any way.
Choose /dev/disk/by-id/scsi-SATA_disk1 if prompted to install the MBR loader.
Ignore warnings that are caused by the chroot environment like:
Can not write log, openpty() failed (/dev/pts not mounted?)df: Warning: cannot read table of mounted file systemsmtab is not present at /etc/mtab.
5.7 Set a root password on the new system:
# passwd root
Hint: If you want the ubuntu-desktop package, then install it after the first reboot. If you install it now, then it will start several process that must be manually stopped before dismount.
Step 6: GRUB Installation
Remember: All of Step 6 depends on Step 5.4 and must happen inside the chroot environment.
6.1 Verify that the ZFS root filesystem is recognized by GRUB:
# grub-probe /
zfs
And that the ZFS modules for GRUB are installed:
# ls /boot/grub/zfs*
/boot/grub/zfs.mod  /boot/grub/zfsinfo.mod
Note that after Ubuntu 13, these are now in /boot/grub/i386/pc/zfs*
# ls /boot/grub/i386-pc/zfs*
/boot/grub/i386-pc/zfs.mod  /boot/grub/i386-pc/zfsinfo.mod
Otherwise, check the troubleshooting notes for GRUB below.
6.2 Refresh the initrd files:
# update-initramfs -c -k all
update-initramfs: Generating /boot/initrd.img-3.2.0-40-generic
6.3 Update the boot configuration file:
# update-grub
Generating grub.cfg ...
Found linux image: /boot/vmlinuz-3.2.0-40-generic
Found initrd image: /boot/initrd.img-3.2.0-40-generic
done
Verify that boot=zfs appears in the boot configuration file:
# grep boot=zfs /boot/grub/grub.cfg
linux /ROOT/ubuntu-1/@/boot/vmlinuz-3.2.0-40-generic root=/dev/sda2 ro boot=zfs $bootfs quiet splash $vt_handoff
linux /ROOT/ubuntu-1/@/boot/vmlinuz-3.2.0-40-generic root=/dev/sda2 ro single nomodeset boot=zfs $bootfs
6.4 Install the boot loader to the MBR like this:
# grub-install $(readlink -f /dev/disk/by-id/scsi-SATA_disk1)
Installation finished. No error reported.
Do not reboot the computer until you get exactly that result message. Note that you are installing the loader to the whole disk, not a partition.
Note: The readlink is required because recent GRUB releases do not dereference symlinks.
Step 7: Cleanup and First Reboot
7.1 Exit from the chroot environment back to the LiveCD environment:
# exit
7.2 Run these commands in the LiveCD environment to dismount all filesystems:
# umount /mnt/boot/grub
# umount /mnt/dev
# umount /mnt/proc
# umount /mnt/sys
# zfs umount -a
# zpool export rpool
The zpool export command must succeed without being forced or the new system will fail to start.
7.3 We're done!
# reboot
Caveats and Known Problems
This is an experimental system configuration.
This document was first published in 2010 to demonstrate that the lzfs implementation made ZoL 0.5 feature complete. Upstream integration efforts began in 2012, and it will be at least a few more years before this kind of configuration is even minimally supported.
Gentoo, and its derivatives, are the only Linux distributions that are currently mainlining support for a ZoL root filesystem.
zpool.cache inconsistencies cause random pool import failures.
The /etc/zfs/zpool.cache file embedded in the initrd for each kernel image must be the same as the /etc/zfs/zpool.cache file in the regular system. Run update-initramfs -c -k all after any /sbin/zpool command changes the /etc/zfs/zpool.cache file.
Pools do not show up in /etc/zfs/zpool.cache when imported with the -R flag.
This will be a recurring problem until issue zfsonlinux/zfs#330 is resolved.
Every upgrade can break the system.
Ubuntu systems remove old dkms modules before installing new dkms modules. If the system crashes or restarts during a ZoL module upgrade, which is a failure window of several minutes, then the system becomes unbootable and must be rescued.
This will be a recurring problem until issue zfsonlinux/pkg-zfs#12 is resolved.
When doing an upgrade remotely an extra precaution would be to use screen, this way if you get disconnected your installation will not get interrupted.
Troubleshooting
(i) MPT2SAS
Most problem reports for this tutorial involve mpt2sas hardware that does slow asynchronous drive initialization, like some IBM M1015 or OEM-branded cards that have been flashed to the reference LSI firmware.
The basic problem is that disks on these controllers are not visible to the Linux kernel until after the regular system is started, and ZoL does not hotplug pool members. See https://github.com/zfsonlinux/zfs/issues/330.
Most LSI cards are perfectly compatible with ZoL, but there is no known fix if your card has this glitch. Please use different equipment until the mpt2sas incompatibility is diagnosed and fixed, or donate an affected part if you want solution sooner.
(ii) Areca
Systems that require the arcsas blob driver should add it to the /etc/initramfs-tools/modules file and run update-initramfs -c -k all.
Upgrade or downgrade the Areca driver if something like RIP: 0010:[<ffffffff8101b316>] [<ffffffff8101b316>] native_read_tsc+0x6/0x20 appears anywhere in kernel log. ZoL is unstable on systems that emit this error message.
(iii) GRUB Installation
Verify that the PPA for the ZFS enhanced GRUB is installed:
# apt-add-repository ppa:zfs-native/grub
# apt-get update
Reinstall the zfs-grub package, which is an alias for a patched grub-common package:
# apt-get install --reinstall zfs-grub
Afterwards, this should happen:
# apt-cache search zfs-grub
grub-common - GRand Unified Bootloader (common files)

# apt-cache show zfs-grub
N: Can't select versions from package 'zfs-grub' as it is purely virtual
N: No packages found

# apt-cache policy grub-common zfs-grub
grub-common:
 Installed: 1.99-21ubuntu3.9+zfs1~precise1
 Candidate: 1.99-21ubuntu3.9+zfs1~precise1
 Version table:
*** 1.99-21ubuntu3.9+zfs1~precise1 0
      1001 http://ppa.launchpad.net/zfs-native/grub/ubuntu/precise/main amd64 Packages
       100 /var/lib/dpkg/status
    1.99-21ubuntu3 0
      1001 http://us.archive.ubuntu.com/ubuntu/ precise/main amd64 Packages
zfs-grub:
 Installed: (none)
 Candidate: (none)
 Version table:
For safety, grub modules are never updated by the packaging system after initial installation. Manually refresh them by doing this:
# cp /usr/lib/grub/i386-pc/*.mod /boot/grub/
If the problem persists, then open a bug report and attach the entire output of those apt-get commands.
Packages in the GRUB PPA are compiled against the stable PPA. Systems that run the daily PPA may experience failures if the ZoL library interface changes.
Note that GRUB does not currently dereference symbolic links in a ZFS filesystem, so you cannot use the /vmlinux or /initrd.img symlinks as GRUB command arguments.
(iv) GRUB does not support ZFS Compression
If the /boot hierarchy is in ZFS, then that pool should not be compressed. The grub packages for Ubuntu are usually incapable of loading a kernel image or initrd from a compressed dataset.
(v) VMware
- Set
disk.EnableUUID = "TRUE" in the vmx file or vsphere configuration. Doing this ensures that /dev/disk aliases are created in the guest.
(vi) QEMU/KVM/XEN
In the /etc/default/grub file, enable the GRUB_TERMINAL=console line and remove the splash option from the GRUB_CMDLINE_LINUX_DEFAULT line. Plymouth can cause boot errors in these virtual environments that are difficult to diagnose.
Set a unique serial number on each virtual disk. (eg: -drive if=none,id=disk1,file=disk1.qcow2,serial=1234567890)
(vii) Kernel Parameters
The zfs-initramfs package requires that boot=zfs always be on the kernel command line. If the boot=zfs parameter is not set, then the init process skips the ZFS routine entirely. This behavior is for safety; it makes the casual installation of the zfs-initramfs package unlikely to break a working system.
ZFS properties can be overridden on the the kernel command line with rpool and bootfs arguments. For example, at the GRUB prompt:
linux /ROOT/ubuntu-1/@/boot/vmlinuz-3.0.0-15-generic boot=zfs rpool=AltPool bootfs=AltPool/ROOT/foobar-3
(viii) System Recovery
If the system randomly fails to import the root filesystem pool, then do this at the initramfs recovery prompt:
# zpool export rpool
: now export all other pools too
# zpool import -d /dev/disk/by-id -f -N rpool
: now import all other pools too
# mount -t zfs -o zfsutil rpool/ROOT/ubuntu-1 /root
: do not mount any other filesystem
# cp /etc/zfs/zpool.cache /root/etc/zfs/zpool.cache
# exit
This refreshes the /etc/zfs/zpool.cache file. The zpool command emits spurious error messages regarding missing or corrupt vdevs if the zpool.cache file is stale or otherwise incorrect.
------------------------------------------------------------------------------------------------------------
출처 : http://www.oracle.com/technetwork/articles/servers-storage-admin/howto-build-openstack-zfs-2248817.html
About OpenStack in Oracle Solaris 11
OpenStack, a popular open source project that provides cloud management infrastructure, is integrated into Oracle Solaris 11.2. OpenStack storage features include Cinder for block storage access (see Figure 1) and Swift for object storage that also provides redundancy and replication.
ZFS, a file system that integrates volume management features, provides a simple interface for managing large amounts data. It has a robust set of data services and also supports a variety of storage protocols.
Cinder provisions a ZFS block device or a volume for your project (or tenant) instances. An Oracle Solaris Kernel Zone or a non-global zone is created and deployed for each project instance. After you create a deployable image of the zone and launch an instance of the zone image, Cinder allocates a ZFS volume to contain the instance's image as the guest's root device.
Oracle Solaris 11.2 provides additional Cinder drivers to provision the following devices:
- iSCSI targets from a pool on a Cinder volume node
- FC LUNs as block devices
- iSCSI targets from an Oracle ZFS Storage Appliance
However, using these features is beyond the scope of this article.
A good way to get started with OpenStack is to run a small, all-in-one configuration where all OpenStack services are enabled, along with the Cinder volume service on the same system node, and to use ZFS as the back-end storage.
ZFS provides robust redundancy and doesn't need any special software or hardware arrays to provide data redundancy. ZFS is simple to configure and manage.
This article describes cloud storage practices for deploying a cloud infrastructure environment on Oracle Solaris and using Cinder to provide block storage devices as ZFS volumes on the same system.
This article does not describe how to set up OpenStack. For information on setting up OpenStack, see "Getting Started with OpenStack on Oracle Solaris 11.2."

Figure 1. Diagram of OpenStack Cinder Block Storage Service
OpenStack Block Storage Prerequisites and Deployment Process
The prerequisites require that Oracle Solaris 11.2 OpenStack already be running on a single SPARC or x86 system as the compute node that runs the primary OpenStack services and has multiple local or SAN-based devices.
The components of the configuration include the following:
- Compute node (Nova): The system node where zones for tenant or project instances are managed, but zones are not installed as part of the process described in this article. The Cinder volume service runs on this node as well.
- Volume service (Cinder): The location where the Cinder volume service allocates ZFS volumes for tenant or project instances, which is customized in this article.
- User authorization (Keystone): Both admin and tenant user names and passwords must already have been created and can be provided to Keystone, the authentication service.
The following general steps describe how to customize a single system that runs OpenStack services and runs the Cinder volume service to deploy ZFS volumes. Data redundancy is configured and ZFS compression and encryption can also be added in this configuration.
The remaining sections of this article describe these steps in detail.
Create the ZFS Components
Oracle Solaris runs on a ZFS storage pool that is typically called rpool. This usually small pool is not an ideal environment for hosting a cloud infrastructure, because it contains the Oracle Solaris components that run the system.
A general recommendation is to keep your root pool (rpool) small and host your application, user, and cloud data in a separate pool. Mirrored pool configurations perform best for most workloads.
The following steps describe how to configure the components shown in Figure 2: a mirrored ZFS storage pool (tank), the primary file system (cinder), and the ZFS volumes that will contain the tenant (or project) cloud instances.

Figure 2. A Mirrored ZFS Storage Pool with File System Components
- Create a separate, mirrored ZFS storage pool that provides data redundancy and also configures two spares.
The following example creates a mirrored storage pool called tank that contains two pairs of mirrored disks and two spare disks:
# zpool create tank mirror c0t5000C500335F4C7Fd0 \
c0t5000C500335F7DABd0 mirror c0t5000C500335FC6F3d0 \
c0t5000C500336084C3d0 spare c0t5000C500335E2F03d0 \
c0t50015179594B6F52d0
Size the mirrored storage pool according to your estimated cloud data needs. You can always add another mirrored pair of devices to your mirrored ZFS storage pool if you need more space.
For more information about ZFS administration syntax, see Managing ZFS File Systems in Oracle Solaris 11.2.
Review your pool's current status:
# zpool status tank
Identify the pool's raw available space:
# zpool list tank
- Create a ZFS file system:
Note: If you want to use encryption to secure your cloud data, encryption must be enabled (as described below) when the ZFS file system is created. For more information about ZFS encryption and other encryption key methods besides being prompted for a passphrase, see see Managing ZFS File Systems in Oracle Solaris 11.2.
# zfs create tank/cinder
Review the actual available space that is available to your file system:
# zfs list -r tank/cinder
Frequently review the space available for your ZFS volumes by monitoring the USED space and the AVAIL space.
If you want to conserve disk space, enable compression on the tank/cinder file system. ZFS volumes that are allocated for project instances are automatically compressed.
# zfs set compression=on tank/cinder
If you want to secure your cloud data, consider enabling encryption.
# zfs create -o encryption=on tank/cinder
Enter passphrase for 'tank/cinder': xxxxxxxx
Enter again: xxxxxxxx
Customize the Cinder Storage Location
- Modify the
zfs_volume_base parameter in /etc/cinder/cinder.conf to identify an alternate pool/file-system.
For example, change this line:
# zfs_volume_base = rpool/cinder
To this:
# zfs_volume_base = tank/cinder
- Refresh the Cinder volume services:
# svcadm restart svc:/application/openstack/cinder/cinder-volume:setup
# svcadm restart svc:/application/openstack/cinder/cinder-volume:default
Test Your Cinder Configuration
- Set the authentication environment variables:
Cinder expects the following Keystone authorization parameters to be presented as options on the command line, or you can set them as environment variables.
# export OS_AUTH_URL=http://localhost:5000/v2.0
# export OS_USERNAME=admin-user-name
# export OS_PASSWORD=password
# export OS_TENANT_NAME=tenant-user-name
- Create a 1-GB test volume:
# cinder create --display_name test 1
+---------------------+--------------------------------------+
|       Property      |                Value                 |
+---------------------+--------------------------------------+
|     attachments     |                  []                  |
|  availability_zone  |                 nova                 |
|       bootable      |                false                 |
|      created_at     |      2014-07-17T20:19:33.423744      |
| display_description |                 None                 |
|     display_name    |                 test                 |
|          id         | 258d80e9-2ef3-eab8-fbea-96a4d176360d |
|       metadata      |                  {}                  |
|         size        |                  1                   |
|     snapshot_id     |                 None                 |
|     source_volid    |                 None                 |
|        status       |               creating               |
|     volume_type     |                 None                 |
+---------------------+--------------------------------------+
- After you create a Cinder volume, confirm that it is created and the space is consumed:
# zfs list -r tank/cinder
NAME                             USED  AVAIL REFER MOUNTPOINT
tank/cinder                      1.03G 547G  31K  /tank/cinder
tank/cinder/volume-258d80e9-...  1.03G  546G 16K  -
You can also confirm that the volume is visible from OpenStack's Horizon interface. When you launch a project instance through Horizon, a new Cinder volume is created automatically, so you can remove the test volume from the Horizon->volume menu by using the Delete Volume feature.
(Optional) Perform Additional Cinder Configuration Customization
The following are additional customizations you can do:
- Monitor your ZFS pool for disk failures by setting up
smtp-notify alert notifications. - Use ZFS snapshots to replicate ZFS volumes.
- Create a separate archive pool with ZFS compression enabled to reduce the storage footprint when archiving tenant data.
For more information, see Managing ZFS File Systems in Oracle Solaris 11.2.
Summary
A redundant ZFS storage pool that is serving Cinder volumes for OpenStack can be hosted on any local or SAN storage to provide cloud data protection. You can also apply robust data services, such as encryption for data security or compression for data reduction, to your cloud storage.
See Also
The ZFS blog.
------------------------------------------------------------------------------------------------------------
------------------------------------------------------------------------------------------------------------
출처 : https://wiki.archlinux.org/index.php/Installing_Arch_Linux_on_ZFS
Installing ZFS on a CentOS 6 Linux server
As most of my long term readers know I am a huge Solaris fan. How can’t you love an Operating System that comes with ZFS, DTrace, Zones, FMA and Network Virtualization amongst other things? I use Linux during my day job, and I’ve been hoping for quite some time that Oracle would port one or more of these technologies to Linux. Well the first salvo has been fired, though it wasn’t from Oracle. It comes by way of the ZFS on Linux project, which is an in-kernel implementation of ZFS (this project is different from the FUSE ZFS port).
I had some free time this weekend to play around with ZFS on Linux, and my initial impressions are quite positive. The port on Linux is based on the latest version of ZFS that is part of OpenSolaris (version 28), so things like snapshots, de-duplication, improved performance and ZFS send and recv are available out of the box. There are a few missing items, but from what I can tell from the documentation there is plenty more coming.
The ZFS file system for Linux comes as source code, which you build into loadable kernel modules (this is how they get around the license incompatibilities). The implementation also contains the userland utilities (zfs, zpool, etc.) most Solaris admins are used to, and they act just like their Solaris counterparts! Nice!
My testing occurred on a CentOS 6 machine, specifically 6.2:
$ cat /etc/redhat-release
CentOS release 6.2 (Final)
The build process is quite easy. Prior to compiling source code you will need to install a few dependencies:
$ yum install kernel-devel zlib-devel libuuid-devel libblkid-devel libselinux-devel parted lsscsi
Once these are installed you can retrieve and build spl and zfs packages:
$ wget http://github.com/downloads/zfsonlinux/spl/spl-0.6.0-rc6.tar.gz
$ tar xfvz spl-0.6.0-rc6.tar.gz && cd spl*6
$ ./configure && make rpm
$ rpm -Uvh *.x86_64.rpm
Preparing...                ########################################### [100%]
   1:spl-modules-devel      ########################################### [ 33%]
   2:spl-modules            ########################################### [ 67%]
   3:spl                    ########################################### [100%]
$ wget http://github.com/downloads/zfsonlinux/zfs/zfs-0.6.0-rc6.tar.gz
$ tar xfvz zfs-0.6.0-rc6.tar.gz && cd zfs*6
$ ./configure && make rpm
$ rpm -Uvh *.x86_64.rpm
Preparing...                ########################################### [100%]
   1:zfs-test               ########################################### [ 17%]
   2:zfs-modules-devel      ########################################### [ 33%]
   3:zfs-modules            ########################################### [ 50%]
   4:zfs-dracut             ########################################### [ 67%]
   5:zfs-devel              ########################################### [ 83%]
   6:zfs                    ########################################### [100%]
If everything went as planned you now have the ZFS kernel modules and userland utilities installed! To begin using ZFS you will first need to load the kernel modules with modprobe:
$ modprobe zfs
To verify the module loaded you can tail /var/log/messages:
Feb 12 17:54:27 centos6 kernel: SPL: Loaded module v0.6.0, using hostid 0x00000000
Feb 12 17:54:27 centos6 kernel: zunicode: module license 'CDDL' taints kernel.
Feb 12 17:54:27 centos6 kernel: Disabling lock debugging due to kernel taint
Feb 12 17:54:27 centos6 kernel: ZFS: Loaded module v0.6.0, ZFS pool version 28, ZFS filesystem version 5
And run lsmod to verify they are there:
$ lsmod | grep -i zfs
zfs                  1038053  0
zcommon                42478  1 zfs
znvpair                47487  2 zfs,zcommon
zavl                    6925  1 zfs
zunicode              323120  1 zfs
spl                   210887  5 zfs,zcommon,znvpair,zavl,zunicode
To create our first pool we can use the zpool utilities create option:
$ zpool create mysqlpool mirror sdb sdc
The example above created a mirrored pool out of the sdb and sdc block devices. We can see this layout in the output of `zpool status`:
$ zpool status -v
  pool: mysqlpool
 state: ONLINE
 scan: none requested
config:

	NAME        STATE     READ WRITE CKSUM
	mysqlpool   ONLINE       0     0     0
	  mirror-0  ONLINE       0     0     0
	    sdb     ONLINE       0     0     0
	    sdc     ONLINE       0     0     0

errors: No known data errors
Awesome! Since we are at pool version 28 lets disable atime updates and enable compression and deduplication:
$ zfs set compression=on mysqlpool
$ zfs set dedup=on mysqlpool
$ zfs set atime=off mysqlpool
For a somewhat real world test, I stopped one of my MySQL slaves, mounted the pool on /var/lib/mysql, synchronized the previous data over to the ZFS file system and then started MySQL. No errors to report, and MySQL is working just fine. Next up, I trash one side of the mirror and verified that resilvering works:
$ dd if=/dev/zero of=/dev/sdb
$ zpool scrub mysqlpool
I let this run for a few minutes then ran `zpool status` to verify the scrub fixed everything:
$ zpool status -v
  pool: mysqlpool
 state: ONLINE
status: One or more devices has experienced an unrecoverable error.  An
	attempt was made to correct the error.  Applications are unaffected.
action: Determine if the device needs to be replaced, and clear the errors
	using 'zpool clear' or replace the device with 'zpool replace'.
   see: http://www.sun.com/msg/ZFS-8000-9P
 scan: scrub repaired 966K in 0h0m with 0 errors on Sun Feb 12 18:54:51 2012
config:

	NAME        STATE     READ WRITE CKSUM
	mysqlpool   ONLINE       0     0     0
	  mirror-0  ONLINE       0     0     0
	    sdb     ONLINE       0     0   175
	    sdc     ONLINE       0     0     0
I beat on the pool pretty good and didn’t encounter any hangs or kernel oopses. The file systems port is still in its infancy, so I won’t be trusting it with production data quite yet. Hopefully it will mature in the coming months, and if we’re lucky maybe one of the major distributions will begin including it! That would be killer!!
------------------------------------------------------------------------------------------------------------
------------------------------------------------------------------------------------------------------------
출처 : http://prefetch.net/blog/index.php/2012/02/13/installing-zfs-on-a-centos-6-linux-server/
Installing Arch Linux on ZFS
This article details the steps required to install Arch Linux onto a root ZFS filesystem. This article supplements the Beginners' guide.
Installation
See ZFS#Installation for installing the ZFS packages. If installing Arch Linux onto ZFS from the archiso, it would be easier to use the demz-repo-archiso repository.
Embedding archzfs into archiso
See ZFS article.
Partition the destination drive
Review Beginners' guide#Prepare_the_storage_drive for information on determining the partition table type to use for ZFS. ZFS supports GPT and MBR partition tables.
ZFS manages its own partitions, so only a basic partition table scheme is required. The partition that will contain the ZFS filesystem should be of the type bf00, or "Solaris Root".
Partition scheme
Here is an example, using MBR, of a basic partition scheme that could be employed for your ZFS root setup:
Part     Size   Type
----     ----   -------------------------
   1     512M   Ext boot partition (8300)
   2     XXXG   Solaris Root (bf00)
Here is an example using GPT. The BIOS boot partition contains the bootloader.
Part     Size   Type
----     ----   -------------------------
   1       2M   BIOS boot partition (ef02)
   1     512M   Ext boot partition (8300)
   2     XXXG   Solaris Root (bf00)
An additional partition may be required depending on your hardware and chosen bootloader. Consult Beginners' guide#Install_and_configure_a_bootloader for more info.
Format the destination disk
Format the boot partition as well as any other system partitions. Do not do anything to the Solaris partition nor to the BIOS boot partition. ZFS will manage the first, and your bootloader the second.
Setup the ZFS filesystem
First, make sure the ZFS modules are loaded,
# modprobe zfs
Create the root zpool
# zpool create zroot /dev/disk/by-id/id-to-partition
Warning: Always use id names when working with ZFS, otherwise import errors will occur.
Create necessary filesystems
If so desired, sub-filesystem mount points such as /home and /root can be created with the following commands:
# zfs create zroot/home -o mountpoint=/home
# zfs create zroot/root -o mountpoint=/root
Note that if you want to use other datasets for system directories (/var or /etc included) your system will not boot unless they are listed in /etc/fstab! We will address that at the appropriate time in this tutorial.
Swap partition
See ZFS#Swap volume.
Configure the root filesystem
First, set the mount point of the root filesystem:
# zfs set mountpoint=/ zroot
and optionally, any sub-filesystems:
# zfs set mountpoint=/home zroot/home
# zfs set mountpoint=/root zroot/root
and if you have seperate datasets for system directories (ie /var or /usr)
# zfs set mountpoint=legacy zroot/usr
# zfs set mountpoint=legacy zroot/var
and put them in /etc/fstab
/etc/fstab
# <file system>        <dir>         <type>    <options>             <dump> <pass>
zroot/usr              /usr          zfs       defaults,noatime      0      0
zroot/var              /var          zfs       defaults,noatime      0      0
Set the bootfs property on the descendant root filesystem so the boot loader knows where to find the operating system.
# zpool set bootfs=zroot zroot
Export the pool,
# zpool export zroot
Warning: Do not skip this, otherwise you will be required to use -f when importing your pools. This unloads the imported pool.
Note: This might fail if you added a swap partition above. Need to turn it off with the swapoff command.
Finally, re-import the pool,
# zpool import -d /dev/disk/by-id -R /mnt zroot
Note: -d is not the actual device id, but the /dev/by-id directory containing the symbolic links.
If there is an error in this step, you can export the pool to redo the command. The ZFS filesystem is now ready to use.
Be sure to bring the zpool.cache file into your new system. This is required later for the ZFS daemon to start.
# cp /etc/zfs/zpool.cache /mnt/etc/zfs/zpool.cache
if you don't have /etc/zfs/zpool.cache, create it:
# zpool set cachefile=/etc/zfs/zpool.cache zroot
Install and configure Arch Linux
Follow the following steps using the Beginners' guide. It will be noted where special consideration must be taken for ZFSonLinux.
- First mount any boot or system partitions using the mount command.
- The procedure described in Beginners' guide#Generate an fstab is usually overkill for ZFS. ZFS usually auto mounts its own partitions, so we do not need ZFS partitions in
fstab file, unless the user made datasets of system directories. To generate the fstab for filesystems, use:
# genfstab -U -p /mnt | grep boot >> /mnt/etc/fstab
Note: - If you chose to create datasets for system directories, keep them in this
fstab! Comment out the lines for the '/, /root, and /home mountpoints, rather than deleting them. You may need those UUIDs later if something goes wrong. - Anyone who just stuck with the guide's directions can delete everything except for the swap file and the boot/EFI partition. It seems convention to replace the swap's uuid with
/dev/zvol/zroot/swap.
- When creating the initial ramdisk, first edit
/etc/mkinitcpio.conf and add zfs before filesystems. Also, move keyboard hook before zfs so you can type in console if something goes wrong. You may also remove fsck (if you are not using Ext3 or Ext4). Your HOOKS line should look something like this:
HOOKS="base udev autodetect modconf block keyboard zfs filesystems"
- Regenerate the initramfs with the command:
# mkinitcpio -p linux
Install and configure the bootloader
For BIOS motherboards
Follow GRUB#BIOS_systems_2 to install GRUB onto your disk. grub-mkconfig does not properly detect the ZFS filesystem, so it is necessary to edit grub.cfg manually:
/boot/grub/grub.cfg
set timeout=2
set default=0

# (0) Arch Linux
menuentry "Arch Linux" {
    set root=(hd0,msdos1)
    linux /vmlinuz-linux zfs=zroot rw
    initrd /initramfs-linux.img
}
if you did not create a separate /boot participation, kernel and initrd paths have to be in the following format:
/dataset/@/actual/path
Example:
   linux /@/boot/vmlinuz-linux zfs=zroot rw
   initrd /@/boot/initramfs-linux.img
For UEFI motherboards
Use EFISTUB and rEFInd for the UEFI boot loader. See Beginners' guide#For UEFI motherboards. The kernel parameters in refind_linux.conf for ZFS should include zfs=bootfs or zfs=zroot so the system can boot from ZFS. The root and rootfstype parameters are not needed.
Unmount and restart
We are almost done!
# exit
# umount /mnt/boot
# zfs umount -a
# zpool export zroot
Now reboot.
Warning: If you do not properly export the zpool, the pool will refuse to import in the ramdisk environment and you will be stuck at the busybox terminal.
After the first boot
If everything went fine up to this point, your system will boot. Once. For your system to be able to reboot without issues, you need to enable the zfs.target to auto mount the pools and set the hostid.
For each pool you want automatically mounted execute:
# zpool set cachefile=/etc/zfs/zpool.cache <pool>
Enable the target with systemd:
# systemctl enable zfs.target
When running ZFS on root, the machine's hostid will not be available at the time of mounting the root filesystem. There are two solutions to this. You can either place your spl hostid in the kernel parameters in your boot loader. For example, adding spl.spl_hostid=0x00bab10c, to get your number use the hostid command.
The other, and suggested, solution is to make sure that there is a hostid in /etc/hostid, and then regenerate the initramfs image. Which will copy the hostid into the initramfs image. To do write the hostid file safely you need to use a small C program:
#include <stdio.h>
#include <errno.h>
#include <unistd.h>

int main() {
    int res;
    res = sethostid(gethostid());
    if (res != 0) {
        switch (errno) {
            case EACCES:
            fprintf(stderr, "Error! No permission to write the"
                         " file used to store the host ID.\n"
                         "Are you root?\n");
            break;
            case EPERM:
            fprintf(stderr, "Error! The calling process's effective"
                            " user or group ID is not the same as"
                            " its corresponding real ID.\n");
            break;
            default:
            fprintf(stderr, "Unknown error.\n");
        }
        return 1;
    }
    return 0;
}
Copy it, save it as writehostid.c and compile it with gcc -o writehostid writehostid.c, finally execute it and regenerate the initramfs image:
# ./writehostid
# mkinitcpio -p linux
You can now delete the two files writehostid.c and writehostid. Your system should work and reboot properly now.
------------------------------------------------------------------------------------------------------------
------------------------------------------------------------------------------------------------------------
출처 : http://blog.boxcorea.com/wp/archives/129
오랫동안 사용하던 E450이 문제가 있어서 수리를 하면서, 그동안 사용하던 solaris9를 solaris10으로 다시 설치했다. disksuit로 구성을 하려다가 오래전에 본 비디오가 생각나서 zfs로 구성을 해 보기로 했다.
개념은 굉장히 간단하며, 사용방법 또한 metadb를 구성하는 것보다 간단하다. 하지만, 아직 확실한 개념 정립이 되지 않아서…
사용하는 디스크는 모두 6개로, 9GB 3개와 18GB 3개다. 9GB 1개는 OS를 설치했고, 나머지는 모두 사용하지 않는 상태다. 디스크는 아래와 같다
bash-3.00# format
Searching for disks…done
AVAILABLE DISK SELECTIONS:
0. c0t0d0 <SUN9.0G cyl 4924 alt 2 hd 27 sec 133>
/pci@1f,4000/scsi@3/sd@0,0
1. c0t1d0 <FUJITSU-MAE3091L SUN9.0G-0706-8.43GB>
/pci@1f,4000/scsi@3/sd@1,0
2. c0t2d0 <IBM-DDRS39130SUN9.0G-S98E-8.43GB>
/pci@1f,4000/scsi@3/sd@2,0
3. c2t0d0 <FUJITSU-MAG3182L SUN18G-1111-16.87GB>
/pci@1f,4000/scsi@4/sd@0,0
4. c3t2d0 <SEAGATE-ST318203LSUN18G-034A-16.87GB>
/pci@1f,4000/scsi@4,1/sd@2,0
5. c3t3d0 <SEAGATE-ST318203LC-0002-16.96GB>
/pci@1f,4000/scsi@4,1/sd@3,0
Specify disk (enter its number):
먼저, zpool을 사용하여 디스크 풀(이름은 fox_pool로 했다)을 만든다. (18GB 짜리 3개)
#zpool create fox_pool c2t0d0 c3t2d0 c3t3d0
#zpool list
NAME SIZE USED AVAIL CAP HEALTH ALTROOT
fox_pool 58.8G 102K 58.7G 0% ONLINE -
9GB 디스크를 하나 더 추가했다.
#zpool add -f fox_pool c0t2d0
예전의 disk suit이 디스크 size에 민감했던 반면에, zfs는 디스크 size가 달라도 잘 추가가 된다. 상태를 확인해보면,
# zpool status
pool: fox_pool
state: ONLINE
scrub: none requested
config:
NAME STATE READ WRITE CKSUM
fox_pool ONLINE 0 0 0
c2t0d0 ONLINE 0 0 0
c3t2d0 ONLINE 0 0 0
c3t3d0 ONLINE 0 0 0
c0t2d0 ONLINE 0 0 0
errors: No known data errors
이렇게 pool을 생성하면 /에 pool이름이 자동으로 마운트되어 사용가능한 상태가 된다. 이게 영 맘에 안들어서 zpool destroy로 만든 pool을 삭제하고 다시 생성했다(마운트하는 방법을 몰라서… ;ㅡㅡ)
#zpool create -f -m /export/home fox_pool c2t0d0 c3t2d0 c3t3d0 c0t2d0
그런데, 이것이 굳이 이럴 필요가 있는것인지 알 수가 없다. 왜냐하면, zfs 로 /export/home 에 zfs를 마운트할 수 있기 때문이다. 즉, 하나의 디스크 풀을 각기 다른 디렉토리에 마운트 할 수 있는것 같다. 그래서 oracle 프로그램용으로 zfs를 생성해서 마운트 해보았다.
#zfs create fox_pool/oracle mount /oracle —> error
#zfs create fox_pool/oracle
# zfs list
NAME USED AVAIL REFER MOUNTPOINT
fox_pool 130K 57.8G 31K /export/home
fox_pool/oracle 24.5K 57.8G 24.5K /export/home/oracle
생성은 잘 되었지만, 문제가 있다. 나는 oracle을 /에 마운트 하고 싶은 것이다.
# zfs destroy fox_pool/oracle
# zfs list
NAME USED AVAIL REFER MOUNTPOINT
fox_pool 99.5K 57.8G 30K /export/home
그래서 삭제를 해 버렸다.
여기서 어떻게 해야할지 모르겠다…… 자, 답을 알아냈다
#zfs create fox_pool/oracle
#zfs set mountpoint=/oracle fox_pool/oracle
마운트 포인트를 변경하니 해결이 된다.
자, 여기서, 일부러 에러를 유발하여 복구시켜보았다.
#dd if=/dev/urandom of=/dev/c3t3d0s0 bs=1024 count=10000
s0는 디스크들의 정보가 기록되는 슬라이스로 보이는데, 이곳을 쓰레기 값으로 채워넣은 것이다.
#zpool scrub fox_pool
이 에러는 복구가 되지 않았다. 사실 내가 원하는것은 이것이 아니었다. 그 후 여러번의 시행 착오를 거쳐서 알아낸 것은, zpool 생성시 어떤 옵션도 주지 않으면 디스크들이 stripe 로 묶이는 것이며, mirror 옵션을 주던가 아니면 가장 중요한, raidz 옵션을 주는 것이다. 사실 내가 원하던 것은 Raid5 였다. mirror도 좋지만, 디스크 두개중 한개밖에 사용할 수 없으니까.
아무튼, Raid-Z 로 디스크를 구성했다. Raid5와 다른점은 디스크 두개로도 구성이 가능하다는 점이다. 사실 이 경우는 mirror와 별 차이가 없는것 같다.
# zpool create fox_pool raidz c2t0d0 c3t2d0
# zpool status
pool: fox_pool
state: ONLINE
scrub: none requested
config:
NAME STATE READ WRITE CKSUM
fox_pool ONLINE 0 0 0
raidz1 ONLINE 0 0 0
c2t0d0 ONLINE 0 0 0
c3t2d0 ONLINE 0 0 0
errors: No known data errors
# df -h
fox_pool 16G 24K 16G 1% /fox_pool
# zpool list
NAME SIZE USED AVAIL CAP HEALTH ALTROOT
fox_pool 33.5G 178K 33.5G 0% ONLINE -
두 개의 디스크에 다시 에러를 유발시킨다. 여기서는 두번째 디스크 c3t2d0s0에 쓰레기값을 넣었다.
# zpool scrub fox_pool
# zpool status
pool: fox_pool
state: ONLINE
status: One or more devices has experienced an unrecoverable error. An
attempt was made to correct the error. Applications are unaffected.
action: Determine if the device needs to be replaced, and clear the errors
using ‘zpool clear’ or replace the device with ‘zpool replace’.
see: http://www.sun.com/msg/ZFS-8000-9P
scrub: scrub completed with 0 errors on Tue May 27 22:00:49 2008
config:
NAME STATE READ WRITE CKSUM
fox_pool ONLINE 0 0 0
raidz1 ONLINE 0 0 0
c2t0d0 ONLINE 0 0 0
c3t2d0 ONLINE 0 0 27
errors: No known data errors
에러를 수정하는 방법에는 두가지가 있다. clear나 replace하는 방법이다. 나는 디스크가 하나 더 있기때문에, replace했다.
#zpool replace fox_pool c3t2d0 c3t3d0
# zpool status
pool: fox_pool
state: ONLINE
scrub: resilver completed with 0 errors on Tue May 27 22:02:22 2008
config:
NAME STATE READ WRITE CKSUM
fox_pool ONLINE 0 0 0
raidz1 ONLINE 0 0 0
c2t0d0 ONLINE 0 0 0
replacing ONLINE 0 0 0
c3t2d0 ONLINE 0 0 27
c3t3d0 ONLINE 0 0 0
errors: No known data errors
잠시후 확인해보면 디스크가 바뀌어 있는것을 확인 할 수 있다.
zpool status
pool: fox_pool
state: ONLINE
scrub: scrub completed with 0 errors on Tue May 27 22:09:20 2008
config:
NAME STATE READ WRITE CKSUM
fox_pool ONLINE 0 0 0
raidz1 ONLINE 0 0 0
c2t0d0 ONLINE 0 0 0
c3t3d0 ONLINE 0 0 0
errors: No known data errors
fox_pool에 남은 c3t2d0를 추가하기 위하여 zpool add명령을 사용했다.
결과는 별로다. 디스크가 raidz로 추가되는 것이 아니라, 기존의 raidz1과 stripe로 묶여버린 것이다. 물론, raidz 옵션을 추가할때 넣어봤지만, 이경우역시 작동되지 않았다.
# zpool status
pool: fox_pool
state: ONLINE
scrub: none requested
config:
NAME STATE READ WRITE CKSUM
fox_pool ONLINE 0 0 0
raidz1 ONLINE 0 0 0
c2t0d0 ONLINE 0 0 0
c3t3d0 ONLINE 0 0 0
c3t2d0 ONLINE 0 0 0
errors: No known data errors
그래서 다시 디스크 세개로 fox_pool을 생성하였으며, 역시 에러를 유발한 후 테스트 하였다.
# zpool scrub fox_pool
# zpool status
pool: fox_pool
state: ONLINE
status: One or more devices has experienced an unrecoverable error. An
attempt was made to correct the error. Applications are unaffected.
action: Determine if the device needs to be replaced, and clear the errors
using ‘zpool clear’ or replace the device with ‘zpool replace’.
see: http://www.sun.com/msg/ZFS-8000-9P
scrub: scrub completed with 0 errors on Tue May 27 21:44:42 2008
config:
NAME STATE READ WRITE CKSUM
fox_pool ONLINE 0 0 0
raidz1 ONLINE 0 0 0
c2t0d0 ONLINE 0 0 0
c3t2d0 ONLINE 0 0 0
c3t3d0 ONLINE 0 0 38
errors: No known data errors
같은방식으로 에러를 유발했다. c3t3d0의 체크섬이 38이다. 이것은 아래 명령으로 수정가능하다.
bash-3.00# zpool clear fox_pool c3t3d0
bash-3.00# zpool status
pool: fox_pool
state: ONLINE
scrub: scrub completed with 0 errors on Tue May 27 21:44:42 2008
config:
NAME STATE READ WRITE CKSUM
fox_pool ONLINE 0 0 0
raidz1 ONLINE 0 0 0
c2t0d0 ONLINE 0 0 0
c3t2d0 ONLINE 0 0 0
c3t3d0 ONLINE 0 0 0
errors: No known data errors
다음은 snapshot을 만들어 보았다. snapshot은 만드는 시점의 데이타를 한번만 반영하는것 같다. 말 그대로 스냅샷을 수행하던 시점의 백업을 만드는 것 같다.
fox_pool에 zfs로 화일시스템을 만들고 세개의 화일(test.txt, last.txt, words)을 생성했다. 그리고 스냅샷을 만들었다.
# ls -al
total 576
drwxr-xr-x 2 root sys 5 May 27 22:26 .
drwxr-xr-x 3 root sys 3 May 27 22:25 ..
-rw-r–r– 1 root root 7105 May 27 22:26 last.txt
-rw-r–r– 1 root root 16566 May 27 22:26 test.txt
-r–r–r– 1 root root 206663 May 27 22:26 words
# zfs snapshot fox_pool/home@snap1
bash-3.00# zfs list
NAME USED AVAIL REFER MOUNTPOINT
fox_pool 424K 33.1G 35.3K /fox_pool
fox_pool/home 316K 33.1G 316K /fox_pool/home
fox_pool/home@snap1 0 – 316K –
# rm words
# ls -al
total 58
drwxr-xr-x 2 root sys 4 May 27 22:37 .
drwxr-xr-x 3 root sys 3 May 27 22:25 ..
-rw-r–r– 1 root root 7105 May 27 22:26 last.txt
-rw-r–r– 1 root root 16566 May 27 22:26 test.txt
bash-3.00# zfs snapshot fox_pool/home@snap2
bash-3.00# zfs list
NAME USED AVAIL REFER MOUNTPOINT
fox_pool 467K 33.1G 35.3K /fox_pool
fox_pool/home 348K 33.1G 57.9K /fox_pool/home
fox_pool/home@snap1 290K – 316K –
fox_pool/home@snap2 0 – 57.9K -
스냅샷은 /fox_pool/home/.zfs/snapshot/snap1 과, /fox_pool/home/.zfs/snapshot/snap2에 각각 저장되어 있다.
# pwd
/fox_pool/home/.zfs/snapshot/snap2
# ls
last.txt test.txt
# cd ../snap2
# ls
last.txt test.txt
snap1로 롤백을 해보았다.
# zfs rollback fox_pool/home@snap1
cannot rollback to ‘fox_pool/home@snap1′: more recent snapshots exist
use ‘-r’ to force deletion of the following snapshots:
fox_pool/home@snap2
# zfs rollback -r fox_pool/home@snap1
cannot unmount ‘/fox_pool/home': Device busy
bash-3.00# pwd
/fox_pool/home
# ls
# cd ..
# zfs rollback -r fox_pool/home@snap1
# cd home
# ls
last.txt test.txt words
이때, 나중에 만든 snap2는 snap1이 만들어지던 시점에는 존재하지않았기때문에, 지워져 버렸다..  그래서 경고메시지가 나왔었군…
암튼, 스냅샷은 디스크를 차지하고 있으므로, 필요가 없으면 제거해준다.
#zfs destroy fox_pool/home@snap1
스냅샷이 저장되는 디렉토리 .zfs 는 ls -al로는 확인이 되지 않았지만, 그 이후는 확인이 가능했다. 아울러, 필요한 화일을 직접 복사하는것도 가능했다.
여기까지 사용해본 소감은, 참 편리하다는거. newfs도 필요없고, 마운트도 필요없고. 생성속도 또한 빠르다. disksuit을 사용해야할 이유를 더 이상 찾을 수가 없다.(물론, solaris10이 아니라면 선택의 여지가 없겠지만…)
마지막으로 참고사이트 : http://docs.sun.com/app/docs/doc/819-5461?l=en 너무 늦게 발견 ;ㅡㅡ
------------------------------------------------------------------------------------------------------------